Easy customization is one of the well-recognized features of WordPress CMS. Whether you’re interested in changing the look of your site or want to tweak the functionality inculcated into the web pages; WordPress enables you to do all this and more with complete amount of ease. Continue reading this post as I’ll walk you through the WordPress Configuration Settings. Hope by the end of this post, you’ll be all excited to explore the multiple possibilities available with tweaking your WordPress website in your own unique way.
So, let’s have a closer look at the screens which control the WordPress Configuration Settings:
General
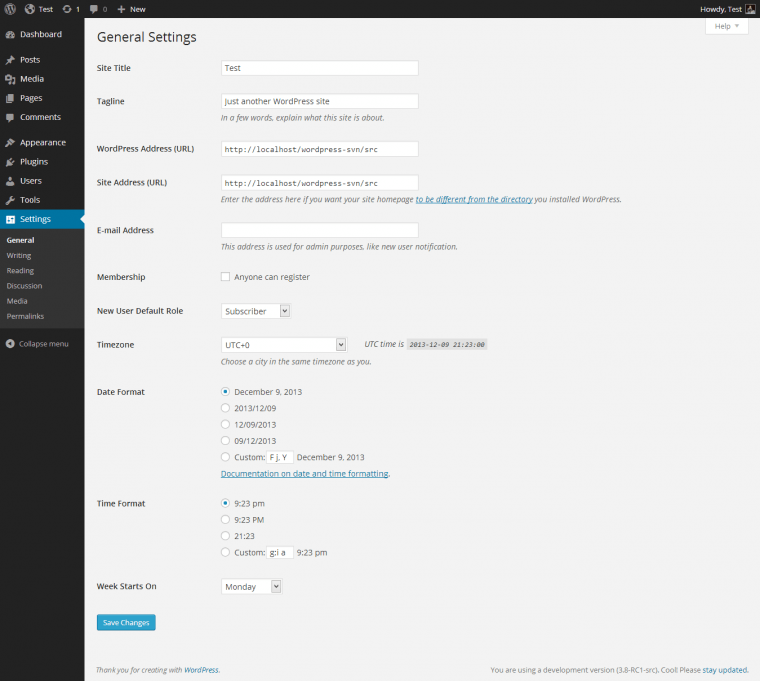
Regarded as WordPress’ default screen in Settings Administration, Settings General Screen comes loaded with controls which allow you to modify some basic configuration settings of your website. Here’s a look at the fields available on this screen:
-
Site Title
For this field, enter the name of your blog/site. By default, WordPress will use the value entered here as the identifying name of the inbuilt RSS feeds utility.
-
Tagline
For this field, enter a short description/tagline/slogan for your WordPress website. Ensure that the text entered here conveys your site’s message.
-
WordPress Address(URL)
Use this field to enter the complete URL of the directory which contains the WordPress core application files such as wp-config, ap-admin, wp-includes and wp-content.
-
Site Address(URL)
Use this field to enter an URL for your site, which the users will be required to type into their browsers for reaching your web portal. The value you enter for this field will be similar to the one you entered for the WordPress Address(URL) field above, unless and until you’re assigning a separate directory to WordPress.
-
Email Address
Use this field for entering the e-mail address to which you’d want receive all messages related to maintenance and administration of your WordPress website. The email address entered here is never displayed in the site’s front-end.
Membership Settings
This is the section which allows you to tweak the way people interact with your WordPress website. The fields covered here include the following:
-
Anyone can register
You can select this checkbox for allowing every visitor to register on your site.
-
New User Default Role
This drop-down list can be used for selecting the default role that must be assigned to all the new users i.e. the members who’ve registered using the Registration page and/or the ones who have been added using Administration-> Users-> Users Screen. The set of choices includes Administrator, Author, Editor or Subscriber.
-
Timezone
This drop-down list can be used for selecting a city which lies in a time zone similar to yours.
-
Date Format
Here, you can select the radio-button for the time format which will be used for displaying dates across your website. Some options you can choose from include:
May 18, 2015
2015/05/18
18/05/2015
-
Time Format
For this field, choose the radio button for the format in which you can the time to be displayed on your website. Some time formats you can choose from include:
8:50am
8:50AM
8:50
-
Week Starts On
This dropdown can be used for selecting the preferred start date for all the calendar applicable for your WordPress website. The default value selected here is ‘Monday’.
-
Site language
This field allows you to set/change the language applicable to your WordPress dashboard.
-
Save Changes
Clicking on this button will save all the changes made to the above fields, into the website’s database. A confirmation message will also be displayed for the same.
Writing
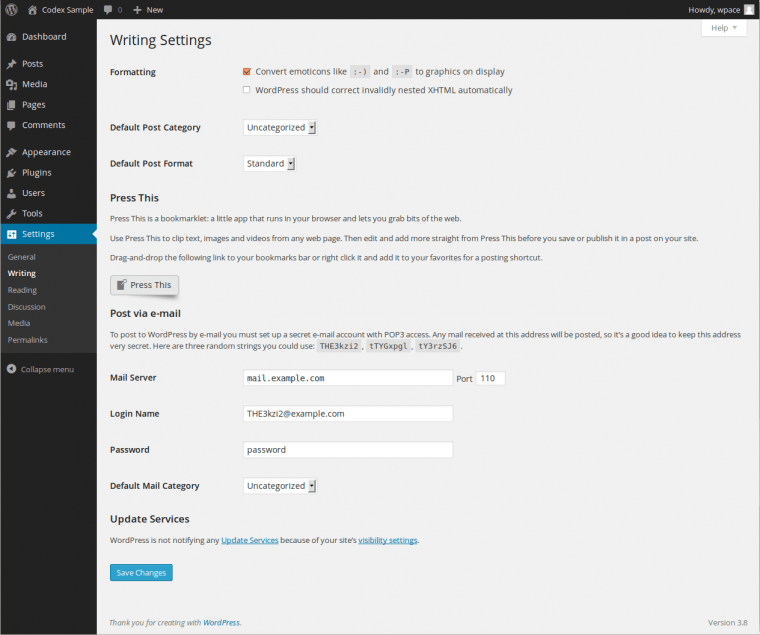
Dedicated to WordPress blog owners, the Settings Writing Screen allows you to control the interface used for writing new posts. The things that can be moderated using this section include the following:
- Formatting of ‘post box’ available on Add New Post Screen
- Default Post format
- Default image size
- Default Post Format
Reading
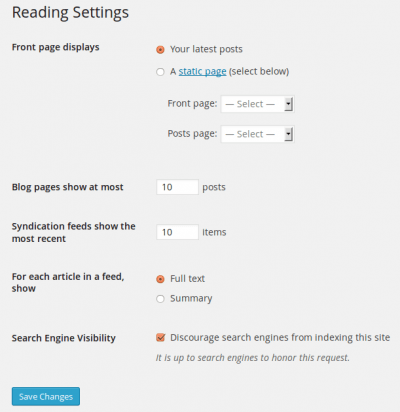
You can use the Settings Reading Screen for moderating whether you want posts or static page to be displayed on the site’s main page. Additionally, you can make adjustments regarding the total count of posts that must be displayed on this page along with the syndication feed features that must be enabled/disabled for the website.
Discussion
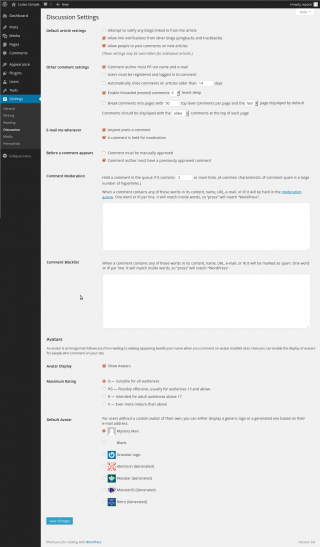
The Settings Discussion Page can be used for controlling the settings pertaining to incoming and outgoing pingbacks, trackbacks and comments.
Media
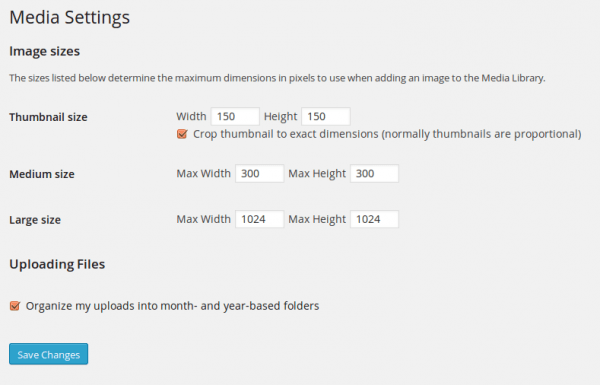
The Settings Media Page allows you to manage the dimensions(image size, thumbnail size etc.) of documents, images and a variety of other media files which are being uploaded to the WordPress Media Library via the site’s front-end.
Permalinks
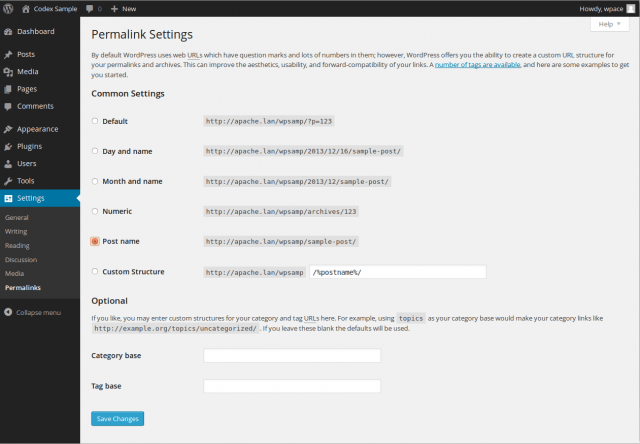
The Settings Permalinks Screen is used for customising the permalinks structure and archives for your WordPress blog. The options available for moderating the site’s permalinks structure include:
- Default
- Day and Name
- Month and Name
- Numeric
- Post name
- Custom structure
Additionally, there are two other text boxes viz: Category Base and Tag base that can be used for entering custom bases for post category and tags respectively.
With that, we’re done!
Conclusion,
Performing small or big tweaks to key areas within your WordPress website/blog is no more a point to worry about, with an excellent understanding of the aforementioned screens.

![Can AI Tools Replace Designers? [12 Marketing Experts Weigh In]](https://www.nirmal.com.au/wp-content/uploads/2025/02/1-800x800.webp)

![AI Marketing Tools [2025]: 11 Experts Share Their Top AI Picks & Insights](https://www.nirmal.com.au/wp-content/uploads/2025/02/2-800x800.webp)